Easy Small-Batch Sauerkraut with Turmeric & Mustard
I'll be honest-for the longest time, I thought homemade sauerkraut meant giant crocks, complicated setups, and weeks of babysitting something I wasn't even sure I'd like. I've always loved fermented foods, but I needed a version that felt approachable, flexible, and realistic for a busy weeknight. That's exactly why I started making small-batch sauerkraut at home.
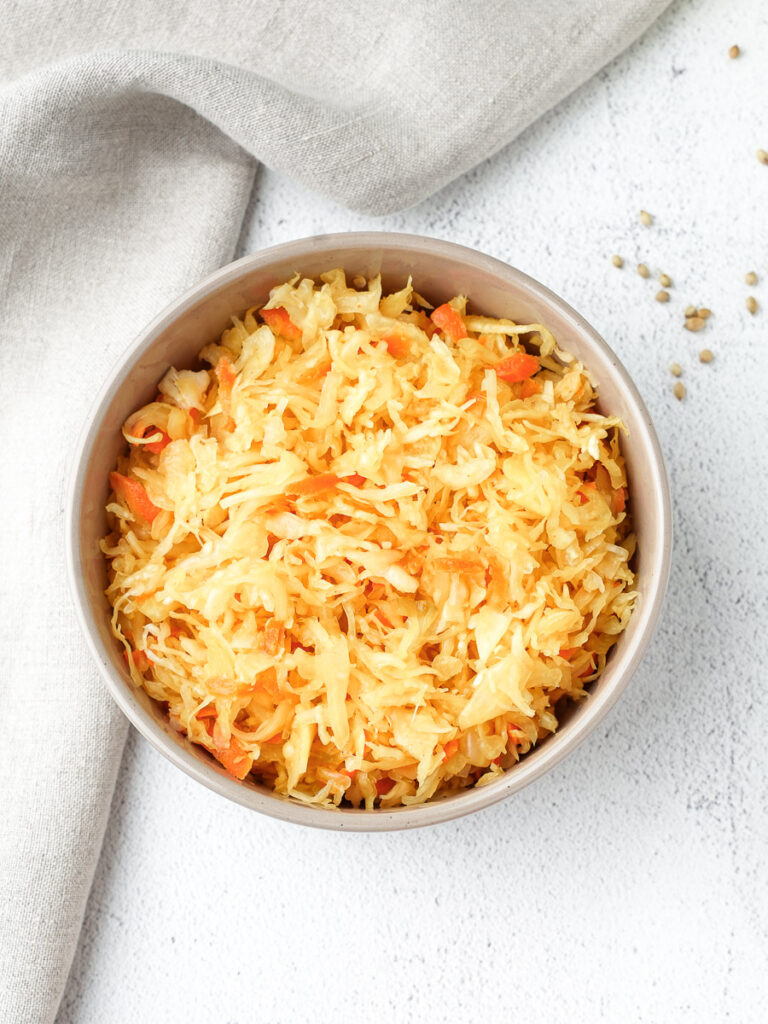
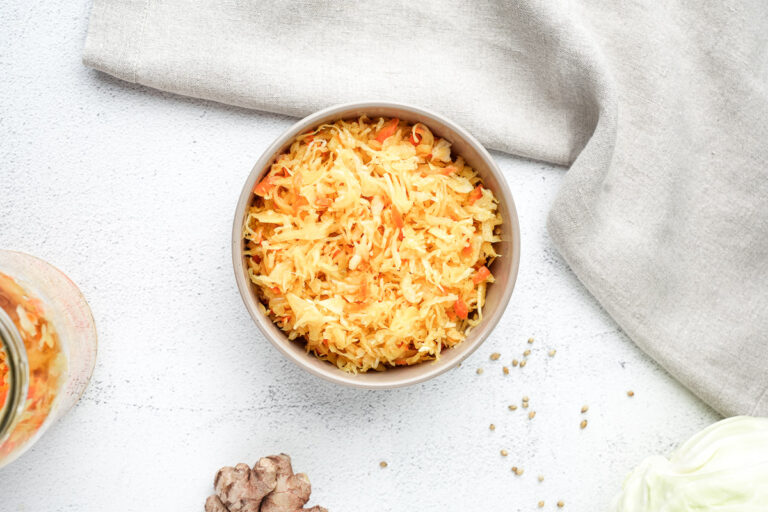
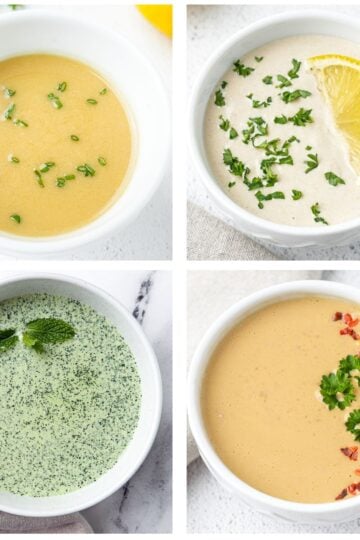
This version of small-batch sauerkraut is infused with turmeric and mustard, which gives it a warm golden color and a subtle depth that pairs beautifully with the natural tang of fermented cabbage. It's made in one simple jar, with real ingredients and no special equipment - perfect if you're looking for a simple, low-effort way to support your gut health without a huge batch taking over your fridge. Fair warning: your hands might turn a little yellow from the turmeric, but watching the brine turn that vibrant gold is the best part.
If you're like me and enjoy experimenting with cabbage beyond classic ferments, this recipe is a great place to start on learning how to ferment cabbage. From quick sautéed cabbage dishes to cozy soups and skillet meals, cabbage is an underrated superfood. Once you master this simple ferment, you'll find yourself reaching for that head of cabbage far more often than you expected.
For more cabbage recipes, be sure to check out my Creamy One-Pan Cabbage and Kielbasa Skillet and Pan-Seared Cabbage Wedges with Miso-Honey Glaze recipes.
Watch How to Make Small-Batch Sauerkraut
Table of Contents
- Why You'll Love This Small-Batch Sauerkraut
- The Benefits of Turmeric & Ginger (Gut Health)
- Ingredients for Small-Batch Sauerkraut
- Step-by-Step Instructions
- Expert Tips for Small-Batch Sauerkraut Fermentation Success
- Variations & Substitutions
- Storage & Shelf Life
- What to Serve with Small-Batch Sauerkraut
- Frequently Asked Questions
- Printable Recipe Card
Why You'll Love This Small-Batch Sauerkraut
I used to avoid making my own ferments because I didn't want a massive, bubbling crock of cabbage sitting in the corner for a month. It felt like a project I didn't have the time for. But once my husband and I started experimenting with single-jar batches, everything changed. It turned into something manageable - a simple kitchen ritual rather than a daunting task.
If you want to support your gut health but need a recipe that actually fits into a busy week, here is why this turmeric and mustard infused kraut is our go-to:
- It's approachable. You don't need any special fermentation weights or expensive equipment for small-batch sauerkraut. I make this in a standard wide-mouth mason jar that sits right on our kitchen counter.
- The flavor isn't one-note. Most store-bought kraut is just salty. This version has an earthy warmth from the turmeric and a is little tangy from the added mustard. It's bright, fresh, and has a much more interesting depth than the plain stuff.
- The golden glow is stunning. There is something so satisfying about watching the cabbage transform into that vibrant, neon yellow. It looks beautiful on a plate and makes even a basic bowl of rice and beans feel more intentional.
- No vinegar shortcuts. Because we're letting this ferment naturally with real salt and its own juices, it's full of the live, active probiotics your gut actually needs. It's the real deal.
- Everything stays crunchy. Since it's a smaller batch, we actually finish the jar while the cabbage is still crisp and vibrant. It never sits around long enough to get mushy or forgotten in the back of the fridge.
The Benefits of Turmeric & Mustard (Gut Health)
I'm a big believer that the food we eat should do more than just taste good - it should actually help us feel better. While the fermentation process is what does the heavy lifting for your gut, adding turmeric and mustard powder turns this into a little jar of "functional" gold.
- Why the Turmeric matters: Most of us know turmeric for its anti-inflammatory perks (thanks to curcumin). But in this recipe, it's about more than just a health boost - it's what gives the kraut that neon-yellow glow that looks so good on a plate. (Just a heads up: it might stain your wooden spoons, but it's worth it!)
- Mustard: The underrated digestive aid: I always have a tin of mustard powder in my pantry, and it's a total secret weapon for ferments. It actually helps stimulate the enzymes that help us digest food, which makes it a perfect partner for cabbage. It adds a sharp, savory depth that keeps the kraut from feeling too one-note.
- Better than Vinegar: If you're used to the shelf-stable sauerkraut at the grocery store, this will be a totally different experience. Most store-bought jars are pasteurized, which kills the good bugs. By making it yourself with real salt and spices, you're creating a jar full of active probiotics that your gut will actually thank you for.
- Real Food, No Fluff: I am always looking for ways to cut out artificial dyes and weird preservatives. With this recipe, the color comes from the root and the punch comes from the mustard seed. It's just real food doing what it does best.
Ingredients for Small-Batch Sauerkraut
One thing I've learned from making this is that the quality of your salt and the freshness of your cabbage really do make a difference in the final crunch.
Since we're leaning into that manageable, real-food approach, the ingredient list for this kraut is intentionally short. We're letting the natural chemistry of salt and cabbage do the heavy lifting here.
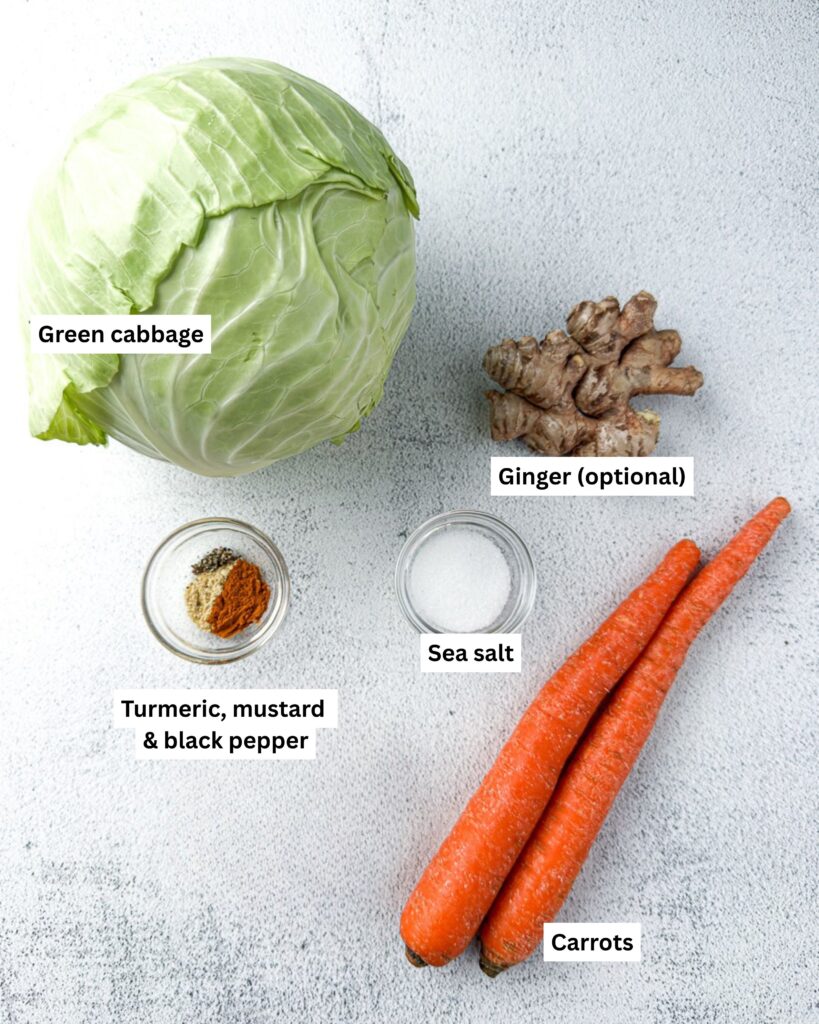
- Green Cabbage (approx. 2 lbs / 900g): Look for a head that feels heavy for its size and has tightly packed leaves. This usually means it has more moisture, which is exactly what we need to create our brine. Don't forget to save one of the clean outer leaves!
- Carrots (2 medium): I like to grate these coarsely. They add a nice hint of sweetness that balances out the earthy turmeric.
- Ground Turmeric (1 tablespoon): This is where that stunning golden color comes from. Just a warning-it will stain your hands and your wooden spoons, so you might want to use gloves for the "massage" phase!
- Mustard Powder (1 teaspoon): This adds a savory, sharp depth that bridges the gap between the sweet cabbage and the earthy turmeric.
- Sea Salt or Kosher Salt (approx. 1.5 - 2 tablespoons): This is the most important part. You want a non-iodized salt (avoid standard table salt), as iodine can interfere with the fermentation process.
- Optional: A pinch of Black Pepper: I always add this because it helps your body absorb the curcumin in the turmeric more effectively.
- Optional: Ginger (½ tsp, minced): If you want a more punchy flavor, a little minced ginger goes a long way.
Step-by-Step Instructions
Step 1. Prep and Shred
Start by peeling off one or two of the clean, outer leaves of your cabbage and set them aside - don't throw them away! We'll use these later as a cap to keep everything submerged.
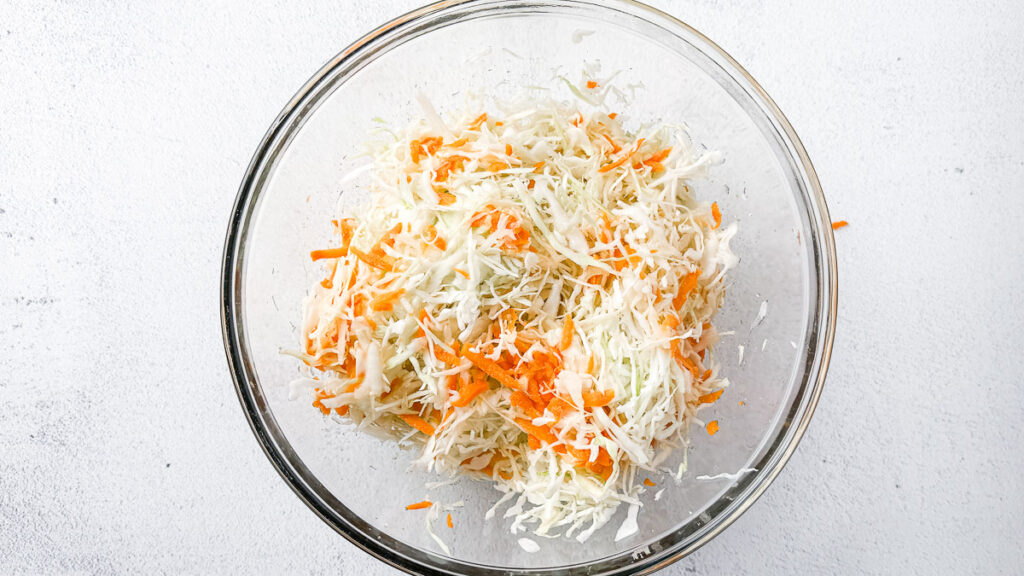
Finely shred the rest of the cabbage with a sharp knife or a mandoline. You're looking for thin, delicate ribbons. Grate your carrots and place everything into a large, non-reactive bowl (glass or stainless steel works best).
Step 2. The Salt Massage
This is the most important step: Add salt to the vegetables. Using your hands, begin to firmly massage and squeeze the cabbage. You'll hear a distinct crunching sound at first, but after about 5 to 10 minutes, the texture will soften, and the cabbage will start releasing its own natural juices.
Keep going until you have a visible pool of brine at the bottom of the bowl. (Pro tip: If your hands are sensitive to turmeric, this is the part where you'll want to wear gloves!)
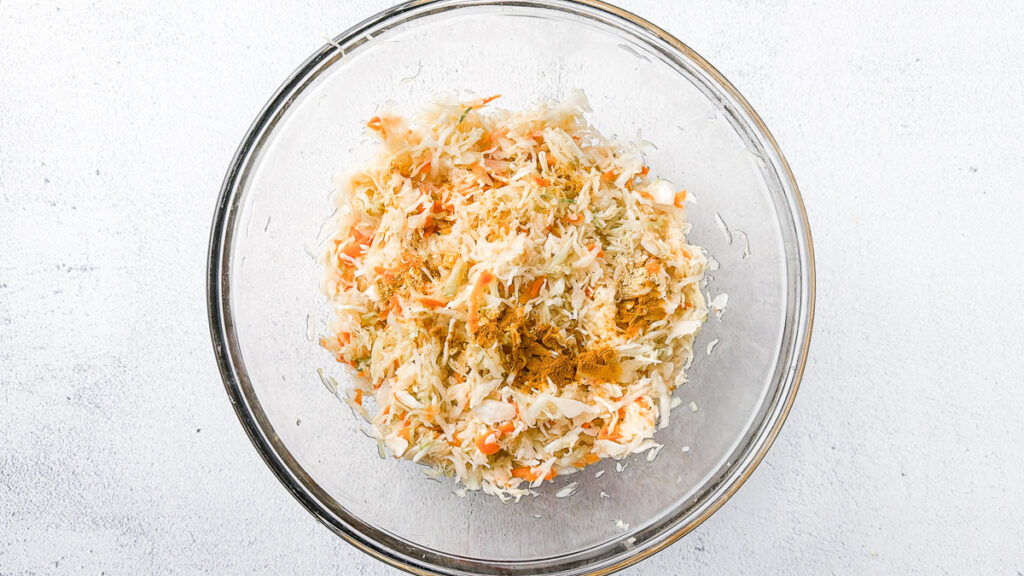
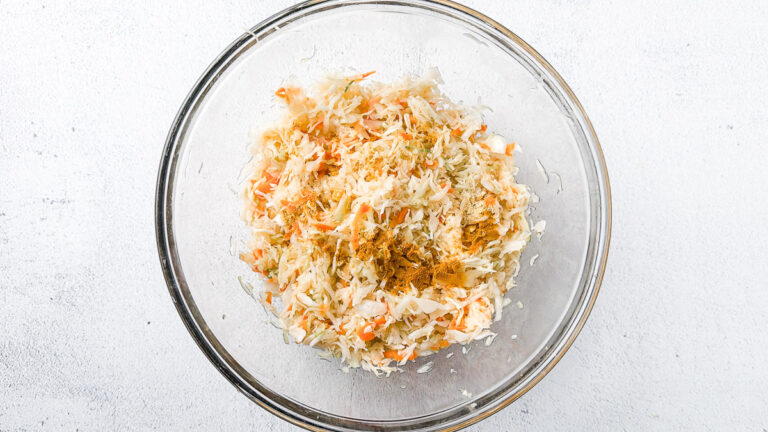
Step 3. Add Spices
Sprinkle the turmeric powder, mustard powder and black pepper over the vegetables. This is the moment where the color really starts to change. The turmeric will immediately begin to turn the cabbage a vibrant, earthy yellow. This is also the moment to add freshly minced ginger or garlic.
Step 4. Pack the Jar
Transfer the mixture into a clean, wide-mouth mason jar. Use your fist or a wooden tamper to pack the cabbage down as tightly as possible. You want to see the brine rise up and completely cover the vegetables. There should be about an inch of headspace left at the top of the jar to allow for expansion.
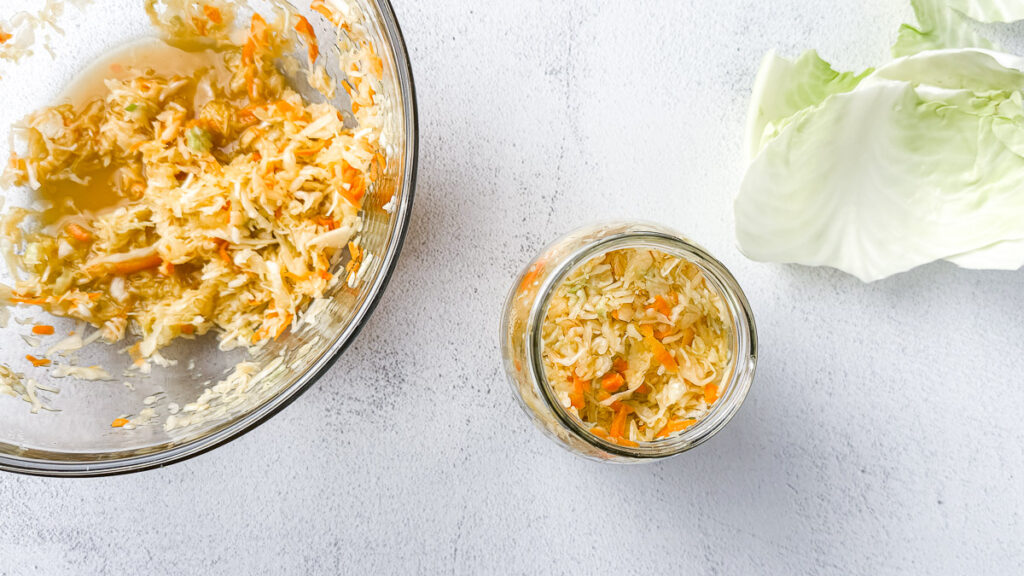
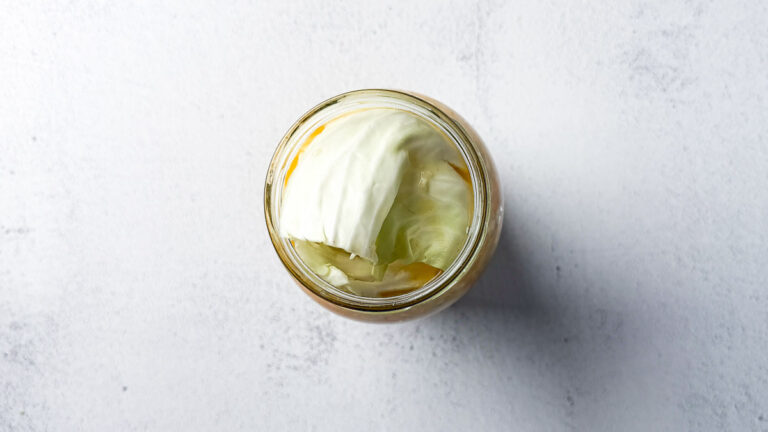
Step 5. The Cabbage Cap
Take that reserved outer leaf from step one, fold it up, and tuck it on top of the shredded cabbage. This acts as a natural cap to keep those small floating bits under the brine. If you have a glass fermentation weight, place it on top now.

Step 6. Ferment and "Burp"
Seal the jar with a lid. Place it in a cool, dark spot on your counter (out of direct sunlight). For the first few days, you'll notice bubbles forming-that's a sign that the good bacteria are doing their job!
If you aren't using a special fermentation lid, make sure to "burp" the jar once a day by slightly unscrewing the lid to release the built-up CO2, then tightening it back up.
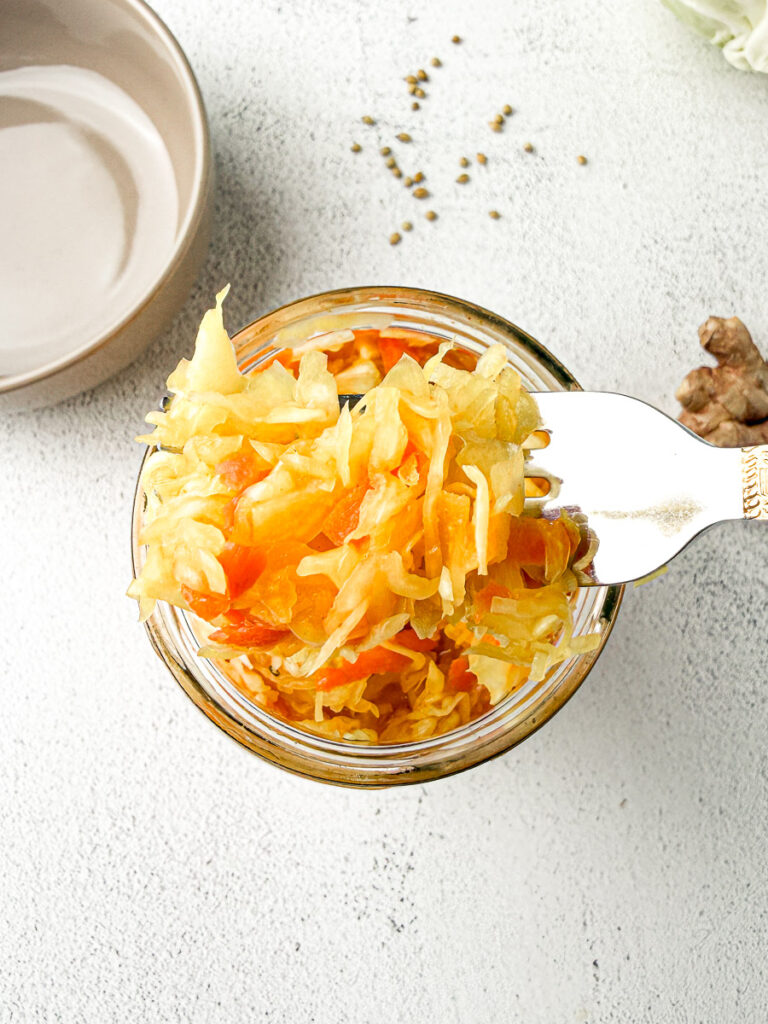
Step 7. Taste and Store
After about 4 to 7 days, give it a taste. If you like it crunchy and mildly tangy, it's ready. If you prefer a deeper, sour punch, let it go for another week. Once it's to your liking, remove the cap leaf and store the jar in the refrigerator. The cold temperature will slow down the fermentation, and the flavors will continue to mellow and develop over time.

Expert Tips for Small-Batch Sauerkraut Fermentation Success
I've had my fair share of fermentation fails over the years, and most of them came down to overthinking the science and ignoring the actual food in front of me. Small-batch sauerkraut fermenting is much more forgiving than the big crocks, but there are a few rules I live by to make sure every jar turns out crunchy and vibrant.
- Salt is the most important ingredient. Don't just grab the standard table salt. You want a high-quality, non-iodized salt like sea salt or kosher salt. Iodine can actually stop those "good bugs" from doing their job, and anti-caking agents can make your brine look muddy.
- If it's under the brine, everything is fine. This is the golden rule of fermentation. Oxygen is what causes spoilage, so as long as your cabbage is tucked under that liquid, you're in the clear. That reserved cabbage leaf cap we talked about earlier is your best insurance policy here.
- Trust your senses, not just the calendar. Fermentation doesn't follow a strict schedule - it reacts to the vibe of your kitchen. If your house is warm, it'll move fast. If it's winter and your kitchen is chilly, it might take an extra week. Don't be afraid to open the jar and taste it starting around day five.
- Don't freak out over bubbles. If you see some foam on top or the brine looks a little cloudy, don't panic! Those are just signs that the bacteria are active and happy. It's a living food, so it's going to move and change.
- The Turmeric Warning. I can't emphasize this enough: turmeric stains everything. If you love your white marble countertops or your favorite wooden spoon, be careful. I usually use a dedicated "fermentation spoon" and wipe down my counters immediately if I splash any brine.
- Temperature is important too. Think of heat as the volume. Warmer temperatures turn the tang up quickly, while cooler spots keep the flavor crisp and clean. I prefer a slower ferment in a pantry corner for a better crunch.
Variations & Substitutions
Once you get the hang of the basic cabbage-and-salt ratio, the fun part starts. I love this version exactly as it is, but I like trying different add-ins depending on what we have in the pantry. Fermentation is surprisingly forgiving, so don't be afraid to make this your own.
- Bring back the ginger: If you want a little more "zing" in your jar, fresh ginger is a fantastic addition. I usually grate about a teaspoon of fresh ginger right into the bowl with the turmeric. It adds a bright, spicy warmth that pairs beautifully with the mustard.
- Different cabbage: If you have half a head of red cabbage leftover from another recipe, throw it in! When you mix red cabbage with turmeric, the brine turns a stunning, deep orange instead of neon yellow. It's one of the prettiest ferments I've ever made.
- Swap the mustard powder: If your spice cabinet is missing mustard powder, you can easily use whole mustard seeds-just give them a light crush with the back of a spoon first to release their oils. If you want a more savory, garlicky kraut, skip the mustard entirely and add two cloves of smashed garlic.
- Add some crunch: If you're feeling adventurous, shredded daikon radish or even a few thin slices of apple add a lovely crispness and a hint of sweetness. I usually keep my add-ins to about a quarter of the total weight so the cabbage still has plenty of room to ferment properly.
- Avoid the Vinegar trap: Whatever you do, don't use prepared yellow mustard from a squeeze bottle. The vinegar in those can interfere with the natural fermentation process. Stick to dry spices or fresh roots to keep the good fermentation bugs happy.

Storage & Shelf Life
Storage
- The Fridge is your Pause Button: Once your small-batch sauerkraut has reached the tanginess you like, move the jar to the refrigerator. The cold temperature doesn't stop the fermentation entirely, but it slows it down to a crawl. We have found that the flavors actually continue to mellow and deepen after a week or two in the cold.
- The Under the Brine Rule Still Applies: Even in the fridge, you want to make sure your cabbage is submerged. If you've been eating from the jar and the liquid level is getting low, just use a clean fork to press the remaining kraut back down into the brine.
Shelf Life
- How long does it last? In theory, a well-salted ferment can last for several months in the fridge. In our house, a small batch usually disappears in about two weeks, but it's good to know it stays safe and delicious for a long time. Over several months, the cabbage might get a little softer, but the flavor will remain excellent.
- Whatever you do, don't heat it (if you want the probiotics): If you're eating this for gut health, you want to keep it raw. High heat kills off those live, active good bugs we worked so hard to grow. I love adding it to warm bowls of rice or soup, but I always stir it in right at the end so it stays raw.
- Signs of a Bad Batch: It's normal for the brine to be a little cloudy or for the smell to be quite punchy (that's just fermentation!). However, if you see fuzzy mold on the surface, if the cabbage feels slimy rather than crunchy, or if it smells off rather than pleasantly sour, trust your gut and toss it.
What to Serve with Small-Batch Sauerkraut
Once that jar is sitting in your fridge, you'll find yourself reaching for it more often than you'd think. Because of the mustard and turmeric, this small-batch sauerkraut has a savory zing that works with way more than just hot dogs. It's the ultimate secret weapon for when a meal feels a little bit flat and needs a hit of acidity and crunch.
- Our favorite way: The Breakfast Bowl. I am obsessed with putting a big forkful of this right on top of soft-scrambled or fried eggs. The sharp acidity of the cabbage cuts through the rich yolk perfectly, and it's the easiest way to get a dose of probiotics before your second cup of coffee.
- Elevate your Pantry Meals. We've all had those nights where dinner is just a quick bowl of rice, beans, or lentils. Adding a scoop of this vibrant yellow kraut makes even the simplest meal feel intentional and bright. It adds a texture that you just can't get from cooked veggies alone.
- The Perfect Partner for Roasts. If you're serving something rich-like roasted chicken, pork chops, or even a heavy beef stew-this kraut is the perfect addition to the table. It brings a freshness to the plate that balances out those heavier, savory flavors.
- Sandwiches with a Crunch. Skip the limp pickles and tuck a layer of this kraut into your turkey wraps or grilled cheese. It stays incredibly crunchy and adds a layer of flavor that really wakes up a standard lunch.
- A Quick Pro-Tip for Gut Health: To keep all those good bugs alive and well, I always recommend adding the kraut after you've finished cooking. I love stirring it into a warm bowl of soup or a hot skillet meal right before I sit down to eat. This keeps the probiotics raw and active while still giving you that wonderful temperature contrast.

Frequently Asked Questions
Making your own ferments can feel a little bit like a science experiment at first, so it's completely normal to have questions. Here are the things I get asked most often when people start their first small-batch sauerkraut jar:
My sauerkraut smells… distinct. Is that normal?
What is the white film on top of my brine?
Can I make this without salt?
Why is my sauerkraut mushy instead of crunchy?
How do I get turmeric stains out of my counters?
Do I have to use a fermentation weight?
If you are looking for more quick and simple recipe ideas that are as delicious as they are easy to make, you might want to try these next:
- Easy Sausage and Egg Breakfast Casserole
- Healthy Almond Butter Banana Chocolate Chip Cookies
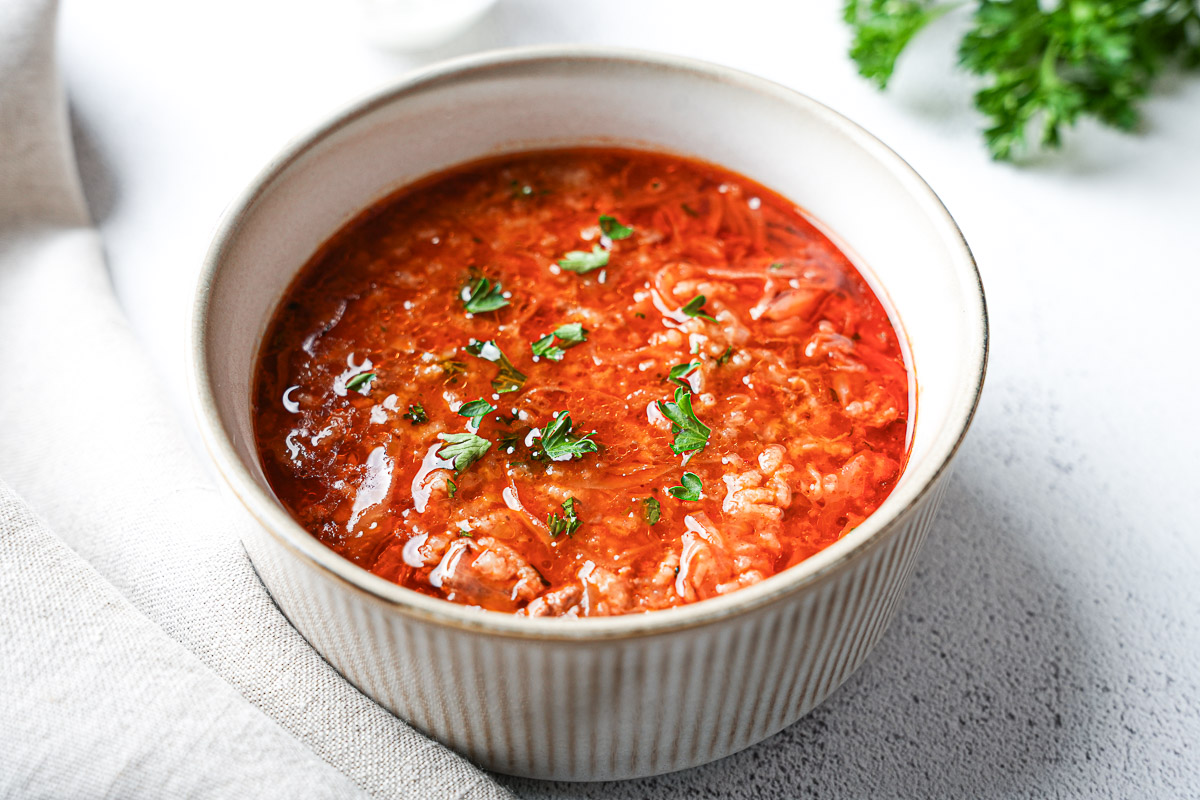
- Easy Stuffed Cabbage Soup

Easy Small-Batch Sauerkraut with Turmeric & Mustard
Equipment
- 1 Quart Wide-Mouth Mason Jar
- Large Glass or Stainless Steel Bowl
- Sharp Chef's Knife or Mandoline
- Box Grater
- Kitchen Gloves (highly recommended to avoid turmeric-stained hands!)
- Fermentation Weight (optional; see Notes for alternatives)
Ingredients
- 1 Cabbage, medium to large (shredded or thinly cut)
- 2 Carrots, medium (shredded)
- 1 tablespoon Ground turmeric
- 1 teaspoon Mustard powder
- 1.5 to 2 tablespoon Sea Salt or Kosher Salt (non-iodized is a must)
- Black pepper (to help with turmeric absorption)
Instructions
- Prepare and Shred: Peel away one or two clean, sturdy outer leaves from the cabbage and set them aside. Finely shred the remaining cabbage into thin ribbons using a knife or mandoline. Grate your carrots and place everything into a large, non-reactive bowl.

- The Massage: Add salt to the vegetables bowl. Using your hands (put on those gloves now!), firmly massage and squeeze the cabbage for 5-10 minutes. You'll know you're done when the cabbage has softened and there is a significant pool of brine (cabbage juice) at the bottom of the bowl.
- Add spices: Add ground turmeric (or you can use fresh grated turmeric), mustard powder and black pepper to the cabbage and mix well.
- Pack the Jar: Transfer the mixture into your clean mason jar, a few handfuls at a time. Use your fist or a wooden tamper to pack it down as tightly as possible. The goal is for the brine to rise up and completely cover the vegetables, leaving about 1 inch of headspace at the top of the jar.
- Submerge: Fold up the reserved outer cabbage leaf and tuck it into the jar so it sits on top of the shredded bits, acting as a cap to keep them under the brine. If you have a fermentation weight, place it on top of that leaf.
- Ferment: Close the jar with a lid. Place it in a cool, dark corner of your kitchen (out of direct sunlight).
- Daily Maintenance: If you aren't using a specialized fermentation lid, burp the jar once a day by slightly unscrewing the lid to release pressure, then tightening it back up.
- Taste and Chill: Start tasting your kraut at the 7-day mark. Once it reaches the level of tanginess you like, remove the cap leaf and move the jar to the refrigerator.


Notes
- The Salt Ratio: For a safe and crunchy ferment, I aim for roughly 2% salt by weight. If you have a kitchen scale, weigh your shredded cabbage and carrots in grams and multiply by 0.02 to get the exact amount of salt needed.
- Submersion is Key: My #1 rule for fermentation is: if it's under the brine, everything is fine. If your cabbage is exposed to air, it can develop mold. Always keep it tucked down!
- Heat & Probiotics: To keep the gut-health benefits alive, never cook or boil your sauerkraut. Add it to warm dishes (like soup or grain bowls) just before serving.
- Turmeric Staining: Turmeric is a powerful natural dye. It will stain wooden spoons, plastic containers, and white countertops. I suggest using glass bowls and stainless steel tools for this recipe.