No-Churn Americone Dream Ice Cream (Ben & Jerry's Copycat)
This no-churn Americone Dream ice cream is the Ben & Jerry's copycat nobody told you was this easy to make at home. Creamy vanilla ice cream base, caramel swirls (like in my Churro cupcakes), and chocolate-dipped waffle cone pieces- all the flavor of the original, with zero ice cream machine required.
All you need is 10 minutes of prep, an overnight freeze, and you've got yourself the best rich and creamy ice-cream ready to be enjoyed!
Ben & Jerry's Americone Dream has been a cult favorite for decades, and this copycat version nails the same flavors using the classic no-churn method.
If you love making easy, impressive frozen treats at home, my whipped Kool-Aid uses the same whipping cream technique and comes together just as quickly for a colorful, crowd-pleasing alternative.
Quick Look:
- ⏱ Prep Time: 10 minutes
- 🔥 Cook Time: 0 minutes
- ⏳ Total Time: 8 hours 10 minutes- including 8 hours freezing time.
- 🧉 Serving: 12-14 servings
- ⚡ Calories: 434 calories per serving
- 🍂 Flavor Profile: Rich, creamy and chocolatey- like my hot chocolate bombs.
- 👌 Difficulty: Easy, no ice-cream machine required.
SUMMARIZE & SAVE THIS CONTENT ON
Jump to:
Why You'll Love this Recipe
- No ice cream machine is needed to make this one! The whipped cream base does all the work. All you need is a stand mixer or a hand mixer.
- It tastes like the real thing- the sweet vanilla, the addictive caramel swirl, and chocolate-covered cone pieces in every single scoop.
- The recipe makes 12-14 scoops, so it's perfect for a summer cookout, a birthday party, or just having something special in the freezer all week.
Recipe Ingredients
- Whipping cream : Heavy whipping cream is the base of the no-churn ice cream. When whipped to stiff peaks, it gives the ice cream its light, creamy texture- I used it for my pumpkin oatmeal cream pies too.
- Sweetened condensed milk: The second half of the no-churn base. It adds the sweetness and richness that makes this taste like real ice cream rather than whipped cream.
- Vanilla: Use pure vanilla extract, not imitation. At this quantity, the quality of the vanilla is noticeable in the final flavor.
- Caramel ice cream topping: Stirred into the base and used as a drizzle on top when serving. Jarred caramel topping (like Smucker's) works perfectly.
- Waffle cones: Cones are broken into pieces and mixed into the ice cream base. The cone pieces soften slightly as they freeze, giving you that signature Americone Dream texture.
- Ghirardelli chocolate chips: To coat the cone pieces and dip the serving cones. Ghirardelli melts smoothly and sets with a good snap.
See the recipe card below for exact quantities.
Recipe Variations, Additions, and Substitutions
- Different mix-ins: The classic version uses caramel and chocolate-dipped cone pieces, but this base is actually adaptable. You can add crushed toffee bars, mini marshmallows, or chocolate chips, fold it into the base alongside or instead of the cone pieces.
- Sauce swap: Swap the caramel topping for hot fudge sauce for a richer, more chocolate-forward version.
- Chocolate swap: Milk chocolate chips give a sweeter, creamier coating on the cones, while dark chocolate gives a slightly bitter contrast that works well against the sweet caramel base.
- Dairy-free: Full-fat canned coconut cream (refrigerated overnight and scooped from the solid layer) can replace the heavy whipping cream. Use dairy-free condensed milk (available at most health food stores) instead of sweetened condensed milk. The flavor will be slightly different but still creamy and delicious.
- Single servings: Instead of a loaf pan, pour the ice cream into silicone muffin molds or individual freezer-safe cups for single-serve portions. This is great for parties or for portioning ahead of time- just like my mini apple crumble cheesecakes.
How to Make No-Churn Americone Dream Ice Cream
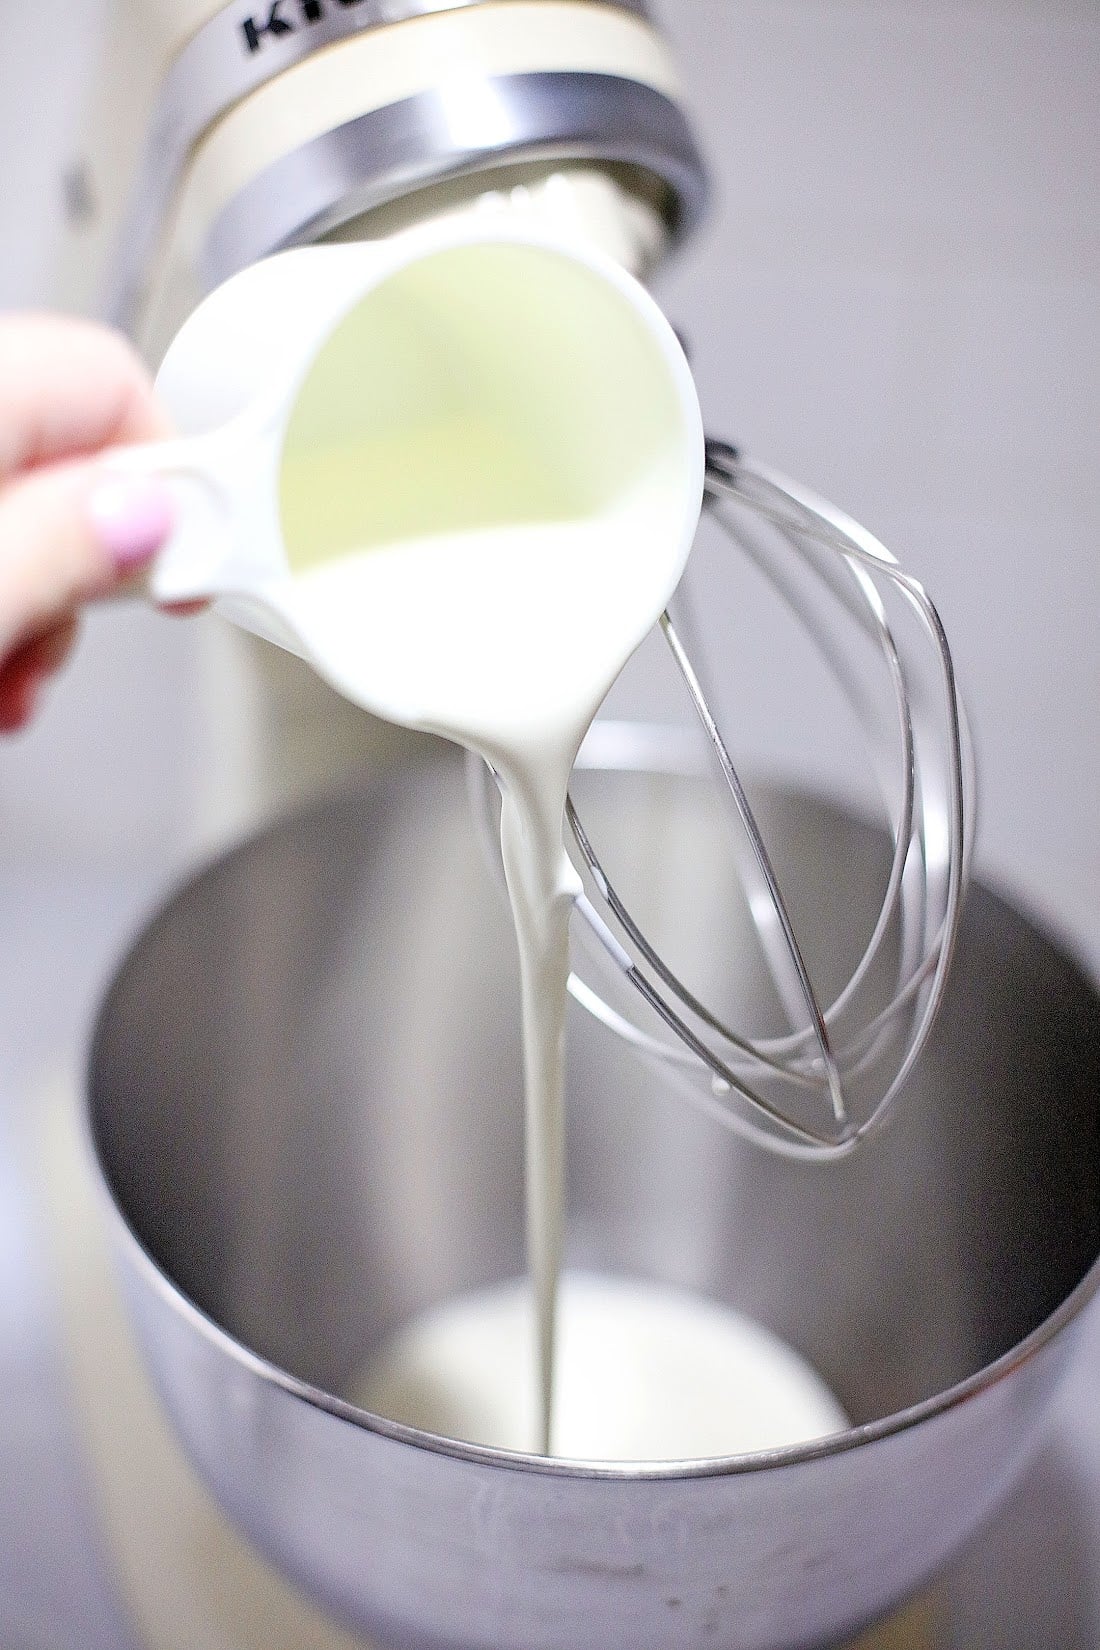
- In the bow of a stand mixer, add whipping cream and whip until you get stiff peaks. Add the condensed milk, vanilla and caramel and blend.
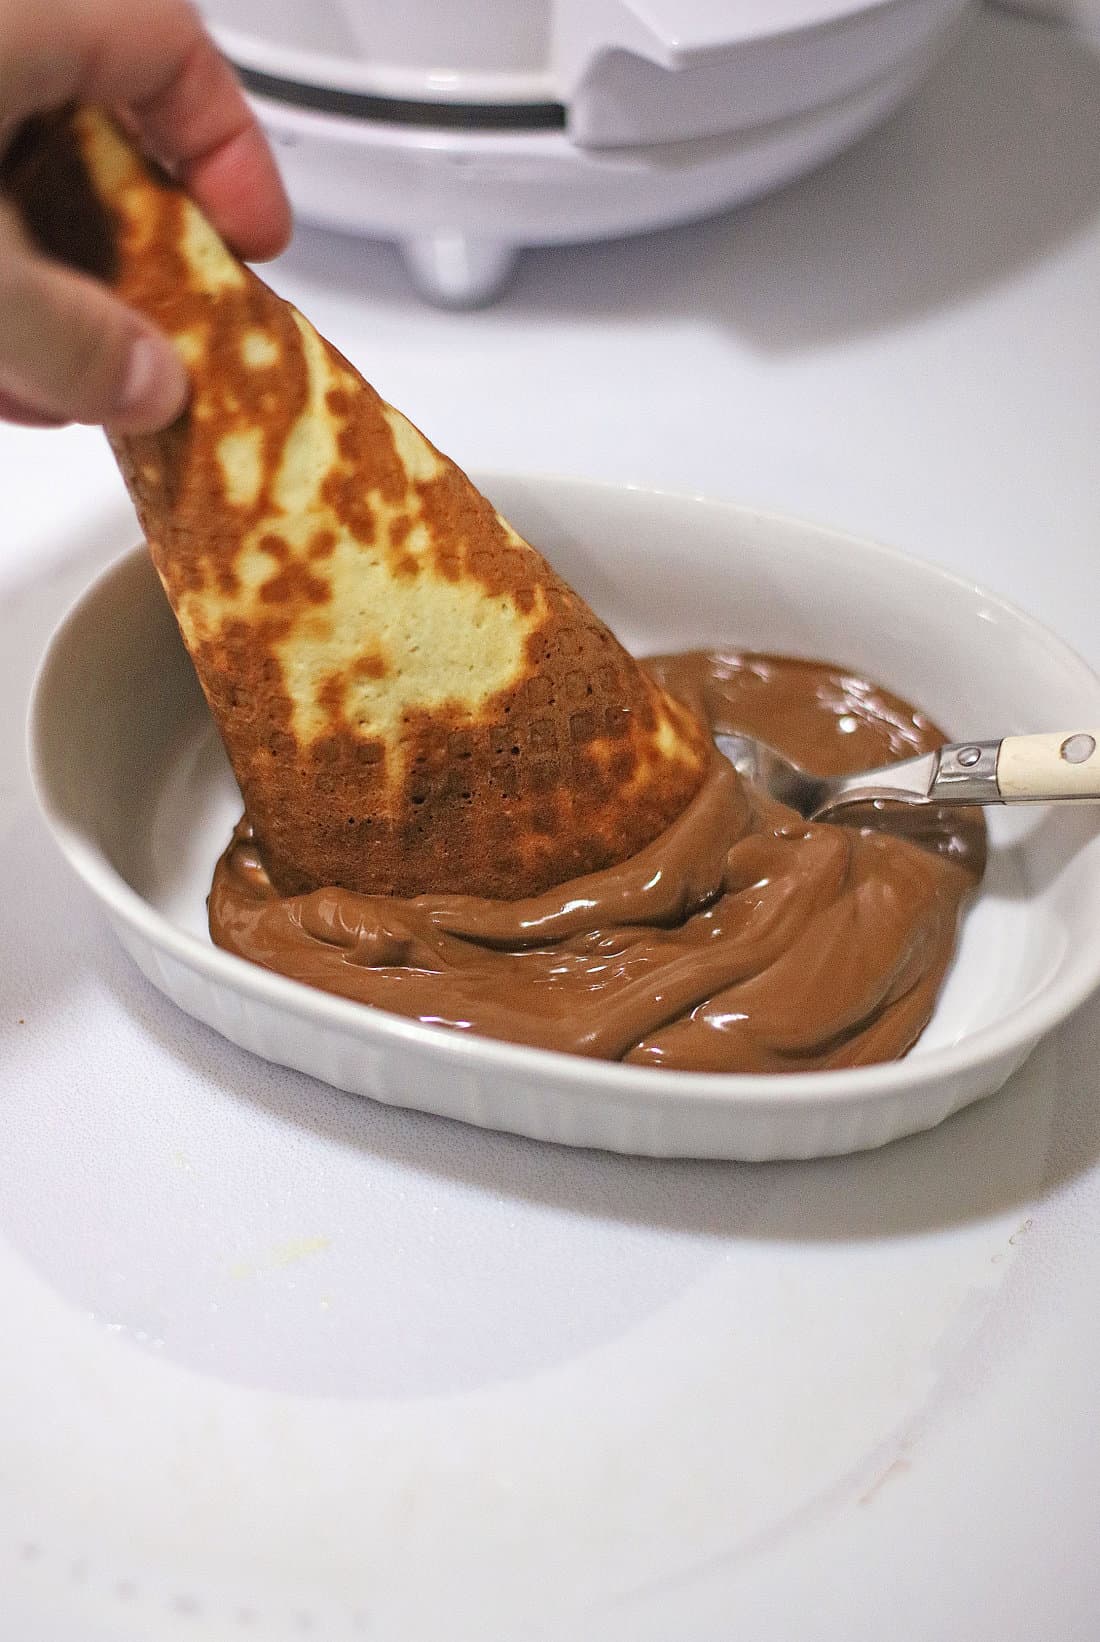
- Melt the chocolate chips and dip the broken ice cream cones into it. Lay them on a parchment paper to cool down and turn solid.
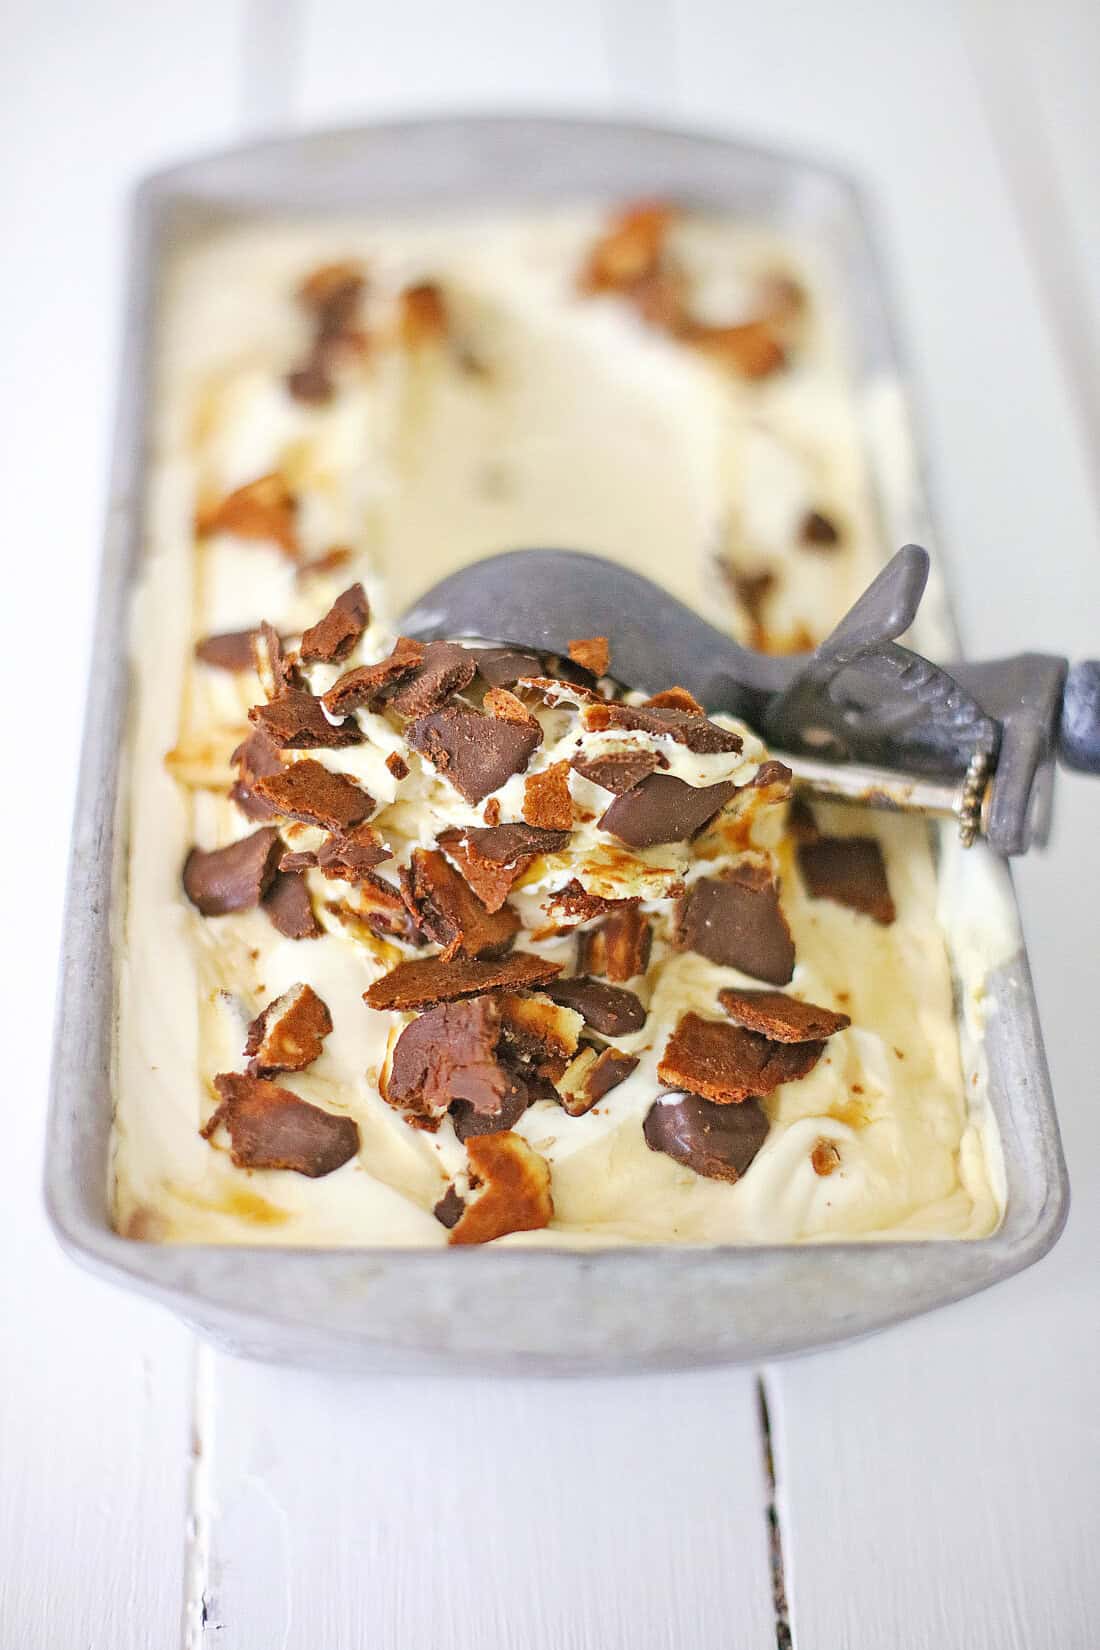
3. Once set, add the chocolate coated broken ice cream cones into the ice cream base and mix once. Cover with cling wrap and freeze overnight.
Recipe Tips & Tricks
- Use heavy whipping cream straight from the fridge. Cold cream is easier to whip and you'll get those stiff peaks much easily. Warm cream can be tricky to work with and produces a less stable base- I realized this when I made my Death Wish coffee milkshake.
- Don't have a stand mixer? A hand mixer works exactly the same way. Whip the cream in a large bowl on medium-high speed until stiff peaks form. You can also whip cream by hand with a whisk, but it takes significantly more effort.
- Press plastic wrap directly onto the surface of the ice-cream before freezing. This is the most important storage step- it prevents air from reaching the ice cream and causing ice crystals to form on the surface.
- Don't over-mix after adding the condensed milk. Blend just until smooth on low speed. Over-mixing deflates the whipped cream and gives you a denser, less creamy final texture.
- Let the cone pieces set fully before folding them into the base. If the chocolate is still soft, it will smear into the ice cream base instead of staying as distinct pieces.
- Let the ice-cream rest at room temperature for 2-3 minutes before scooping. This makes a big difference- the ice cream comes out of the pan cleanly and the scoops hold their shape better.
- Freeze in a loaf pan, not a wide shallow container. A loaf pan gives the ice cream more depth, which means more consistent texture from top to bottom when you scoop.
Serving Ideas & Suggestions
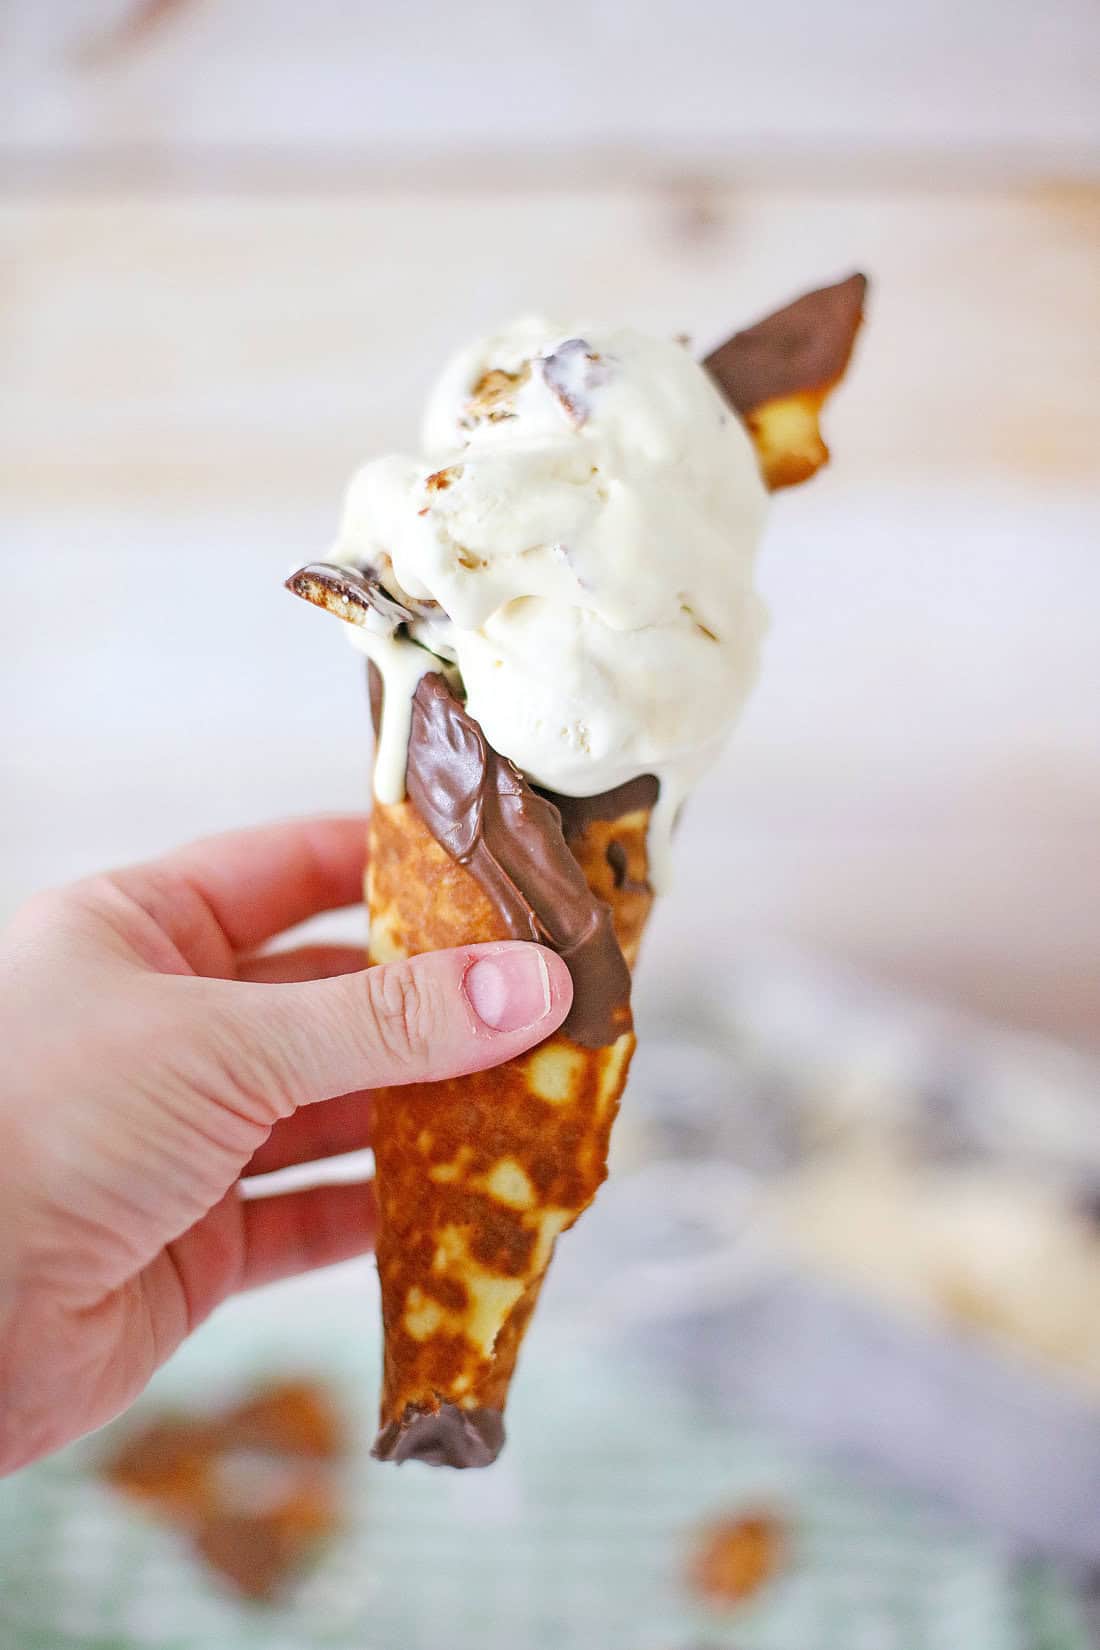
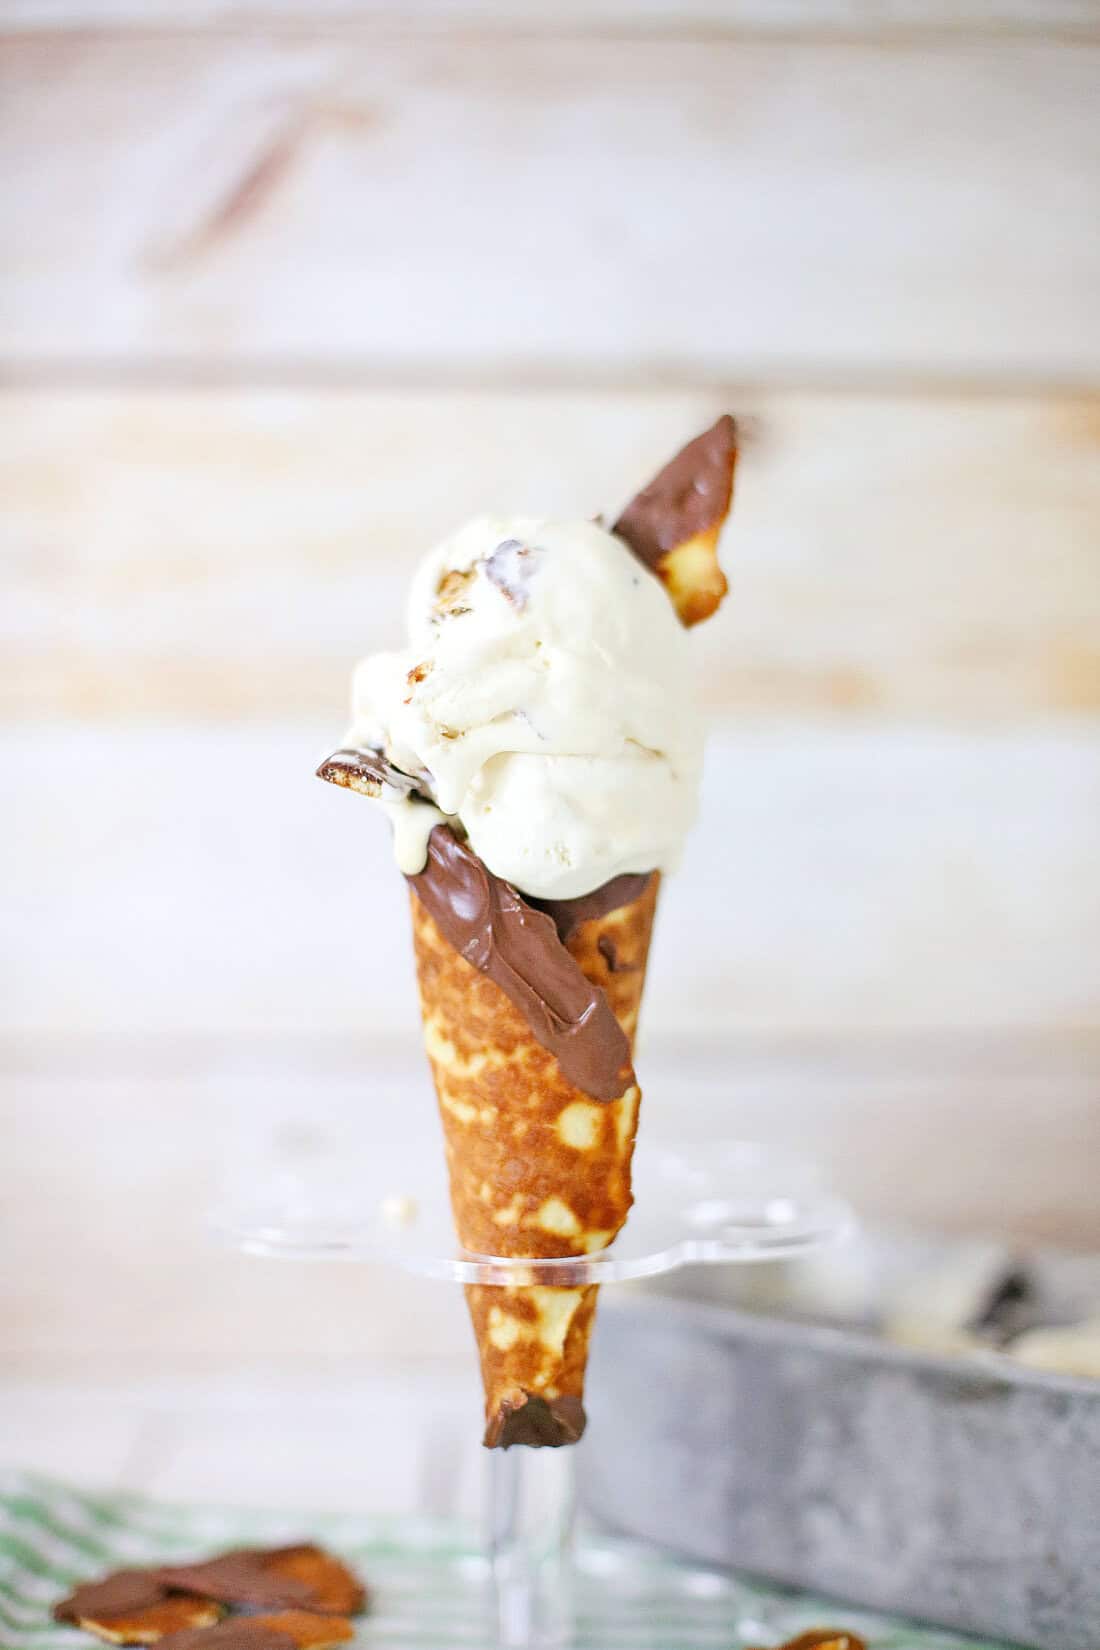
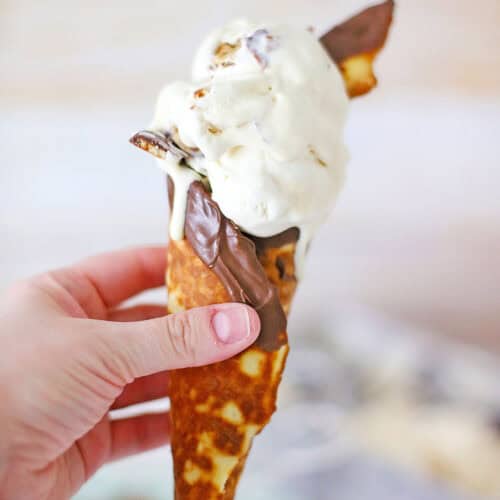
This no-churn Americone Dream ice cream is a complete dessert on its own. You can scoop it into the chocolate-dipped waffle cones and add a drizzle of caramel for the full Ben & Jerry's experience.
For a summer party dessert spread, serve it alongside other easy crowd-pleasing treats like some old-fashioned Jello Balls, my delicious puff pastry strawberry strudel. You can also serve a round of Fruity Pebbles margarita(for the adults), and finish everyone off with a scoop of this.
Recipe FAQs
If the plastic wrap wasn't pressed directly onto the surface before freezing and there's an air gap, or the ice cream was frozen for too long without being consumed, it could cause the ice cream to be icy.
Yes! This recipe is ideal for making ahead. Prepare it the night before and freeze overnight. It keeps well for up to 2 weeks in the freezer, so you can make it days in advance for a party.
Store the ice cream in the loaf pan with plastic wrap pressed directly onto the surface, then cover with the lid or a layer of foil. It keeps well for up to 2 weeks. Beyond 2 weeks, the texture starts to degrade and ice crystals can form.
More Sweet Treats


If you tried this no-churn Americone Dream ice cream or any other recipe on my blog, please leave a 🌟 star rating and let me know how it goes in the comments. I love hearing from you!
No-Churn Americone Dream Ice Cream (Ben & Jerry's Copycat)
Ingredients
- 2 Cups of Heavy Whipping Cream
- 1 can of Sweetened Condensed Milk
- 1 Tablespoon of Vanilla
- 1 jar of Caramel - Ice Cream Topping
- 1 box of Waffle Cones
- 1 cup of Ghirardelli Chocolate Chips - melted
Instructions
- Melt the Ghirardelli Chocolate Chips in the Microwave, at 15 second intervals until completely melted.
- Open the box of Waffle Cones, and remove two of the cones.
- Break them up into pieces, and dip them into the melted chocolate, and lay on Parchment paper.
- Dip the remaining Ice Cream Cones, around the edges, in the melted Chocolate, and lay on the Parchment paper to set.
- In the mixing bowl of a stand Mixer, add the Whipping Cream, and whip until thick, and stiff peaks have formed.
- Add the Sweetened Condensed Milk, Vanilla, and Caramel, and blend until smooth and creamy.
- Fold in the broken Waffle Cone Pieces, and stir well.
- Pour the Ice Cream in a Loaf Pan, and place in the Freezer, Overnight.
- When ready to serve, scoop the Ice Cream into the Chocolate dipped Waffle Cones and drizzle Caramel over the top of the Ice Cream.
- Serve, and Enjoy!
Notes
- Don't over-mix after adding the condensed milk. Blend just until smooth on low speed. Over-mixing deflates the whipped cream and gives you a denser, less creamy final texture.
- Press plastic wrap directly onto the surface of the ice-cream before freezing. This is the most important storage step- it prevents air from reaching the ice cream and causing ice crystals to form on the surface.
- Don't have a stand mixer? A hand mixer works exactly the same way. Whip the cream in a large bowl on medium-high speed until stiff peaks form. You can also whip cream by hand with a whisk, but it takes significantly more effort.
- Let the ice-cream rest at room temperature for 2-3 minutes before scooping. This makes a big difference- the ice cream comes out of the pan cleanly and the scoops hold their shape better.
Nutrition